Configuring SSO Setup
NOTE: See the SmartSolve Installation Guide for instructions on how to configure the WebConfig file to enable the single sign-on feature.
- From the SmartSolve Portal Page, click the Admin tab.
- In the User Management menu, click SSO Setup.
Result: The Single Sign-On Setup window is displayed. - Click Action > Add.
Result: The Single Sign-On Setup entry window is displayed.
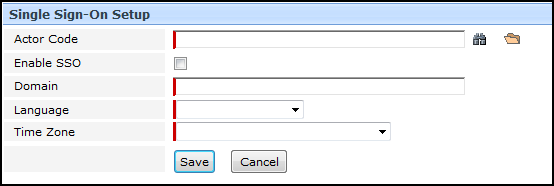
- Enter the information in the following fields:
| Field | Required | Description |
|---|---|---|
|
Actor Code |
Yes |
Enter or zoom to select single or multiple actors for whom SSO is being enabled. |
| Enable SSO |
Yes |
Check this checkbox to enable SSO for the selected actor(s). |
|
Domain |
Yes |
Enter the user’s network domain. This activates the single sign-on option for the actor in SmartSolve. |
|
Language |
Yes |
Select the language to be used when the actor logs into SmartSolve. |
|
Time Zone |
Yes |
Select the Time Zone which the system will default to when this actor logs into SmartSolve. |
- Click the Save button.
Result: Single sign-on has been enabled fro all selected actors. The selected actors will now be automatically logged into SmartSolve under the specified language and time zone next time they log into their domains.
See Also